Accessory Replacement
This guide applies to the following models:
- PowerFlex 2000
- PowerFlex 2000 Eco
- PowerFlex 3000 AC
- PowerFlex 3000 Hybrid
- SolidFlex 2000
- SolidFlex 2000 Eco
- SolidFlex 3000 AC
Before You Start
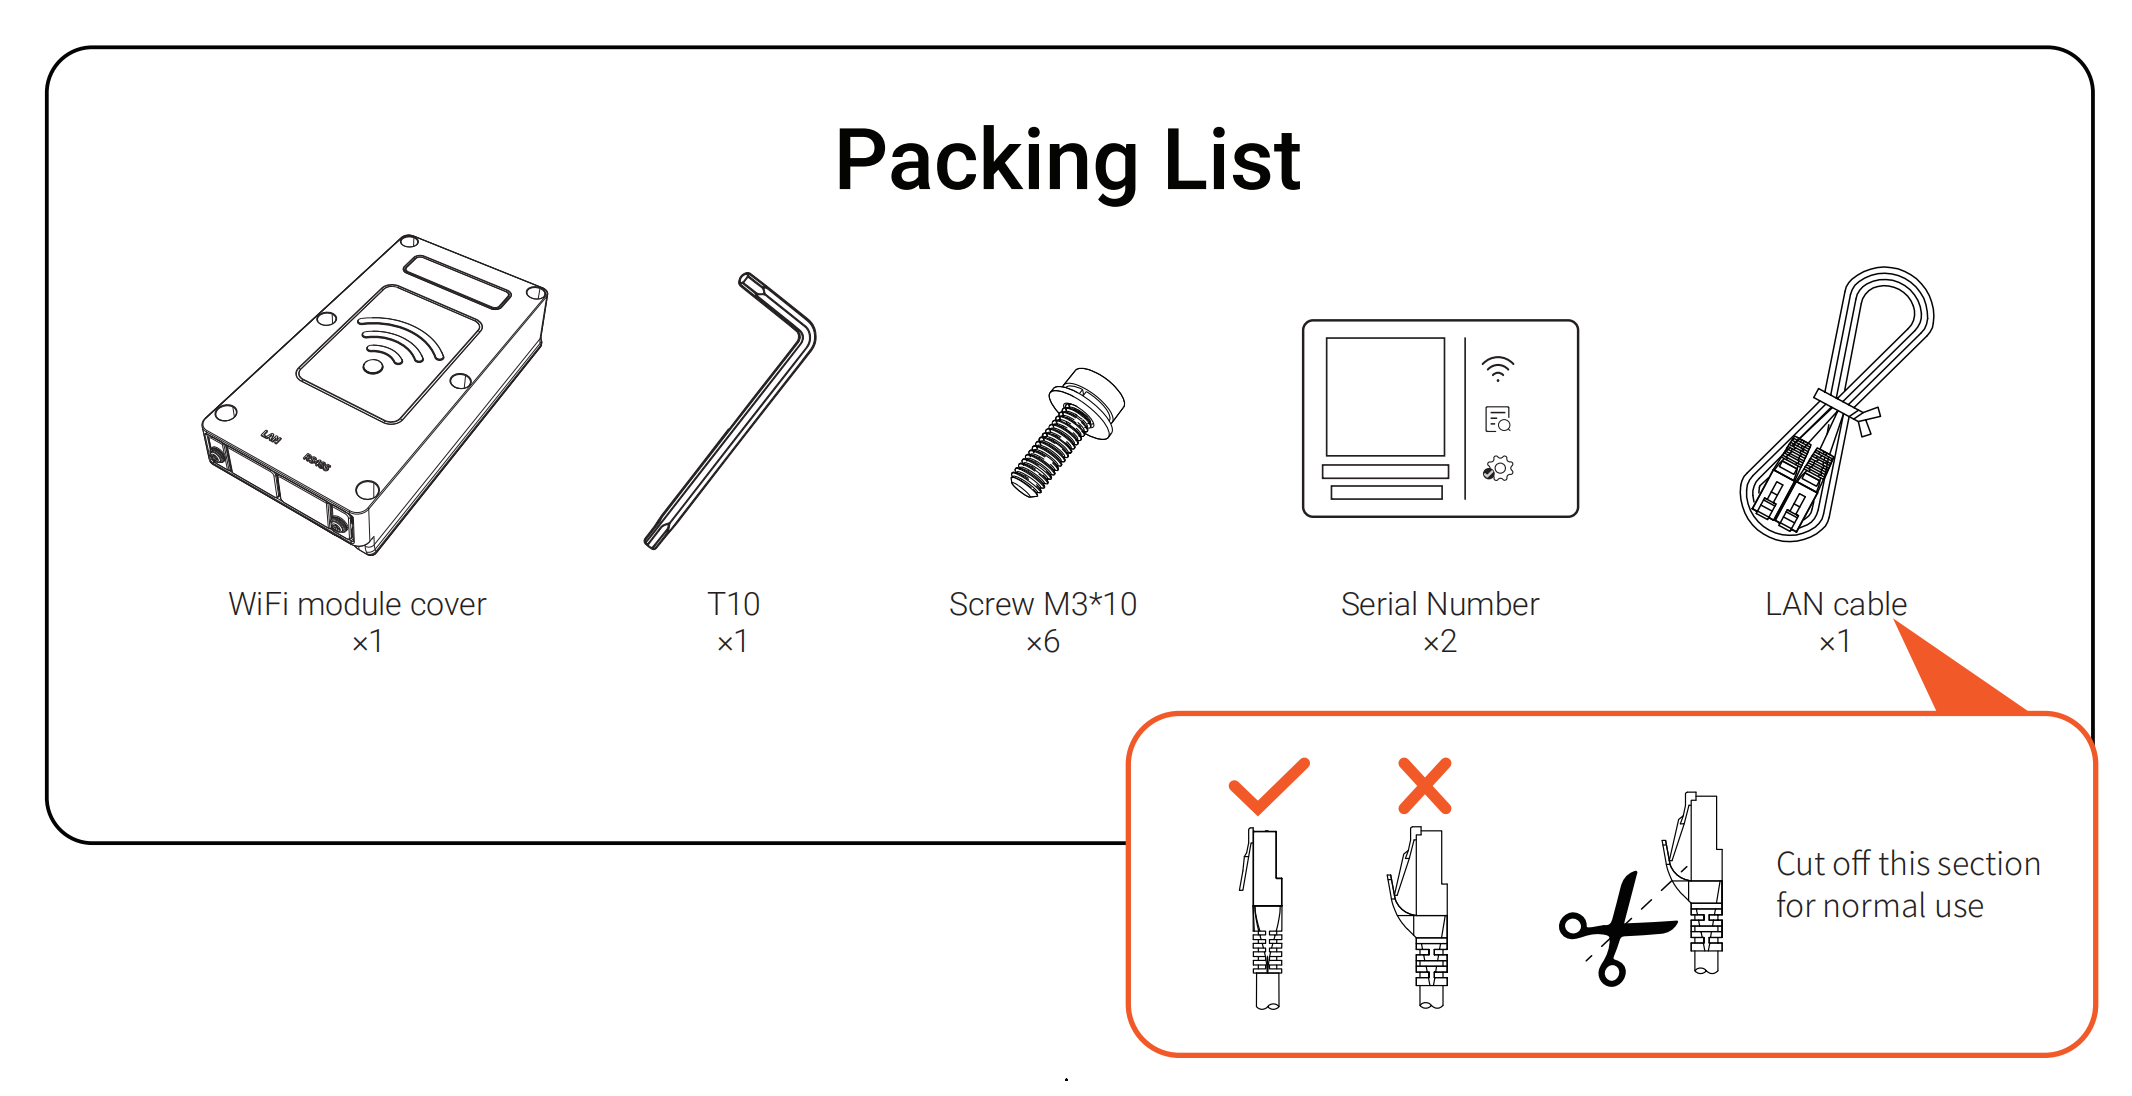
Before starting the replacement, ensure that the package is intact. Open the package and remove all accessories. Verify the quantity and model of each item against the packing list.
Step 1. Remove the Existing Module
Before replacing the module, please ensure that the device is powered off.
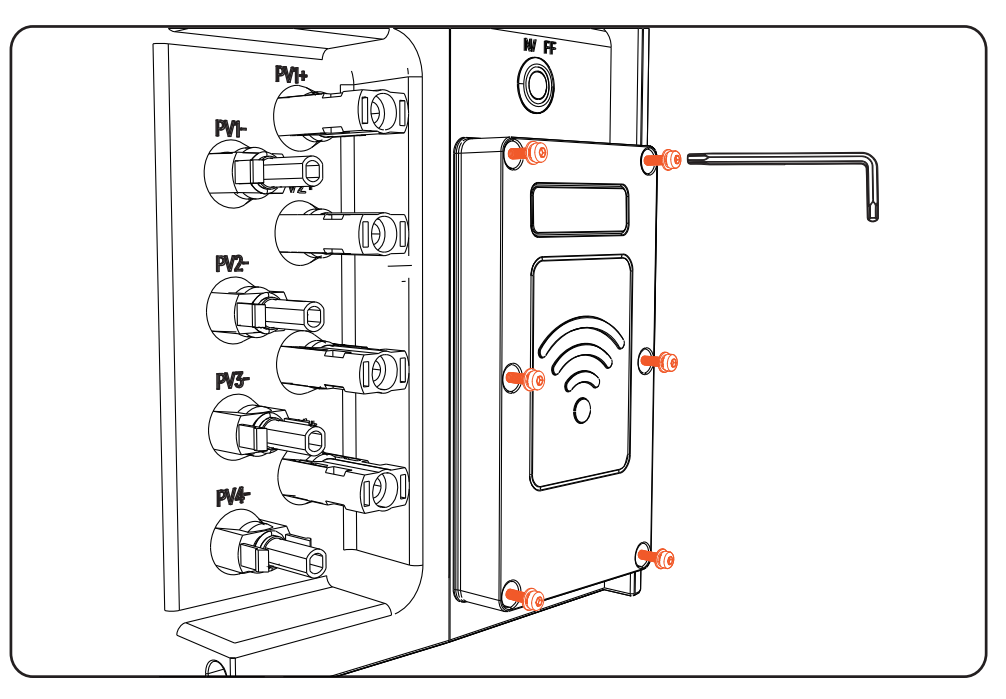
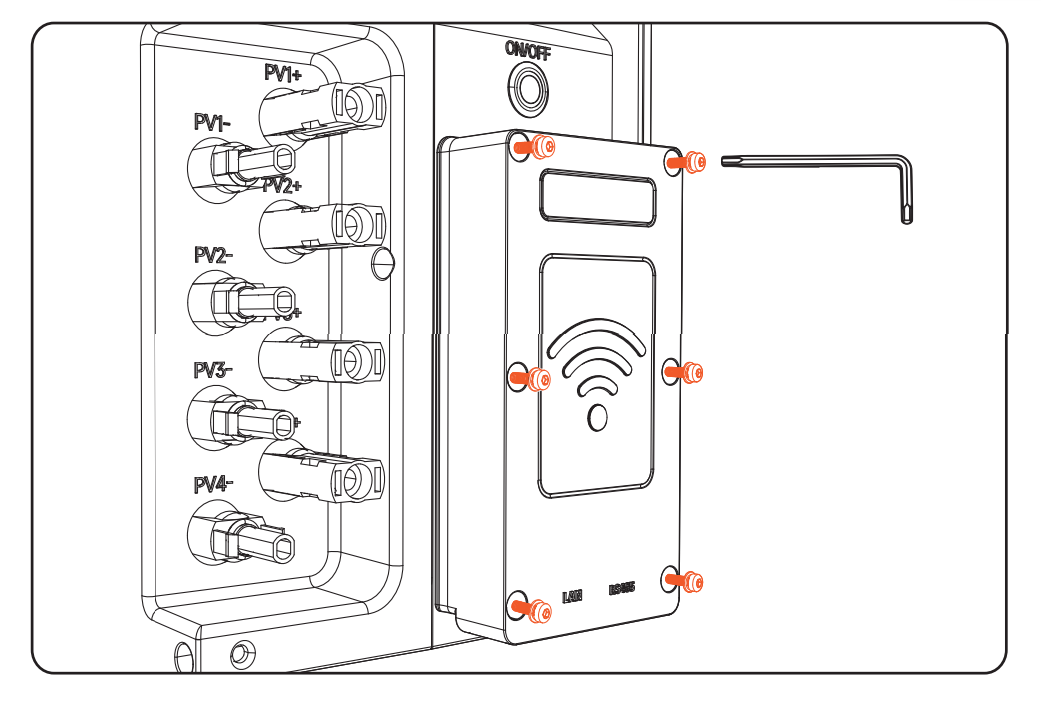
1. Remove the fastening screws
Use the screwdriver included in the package to remove the six screws securing the module.
Note: Keep the screws in a safe place, as they will be reused during installation.
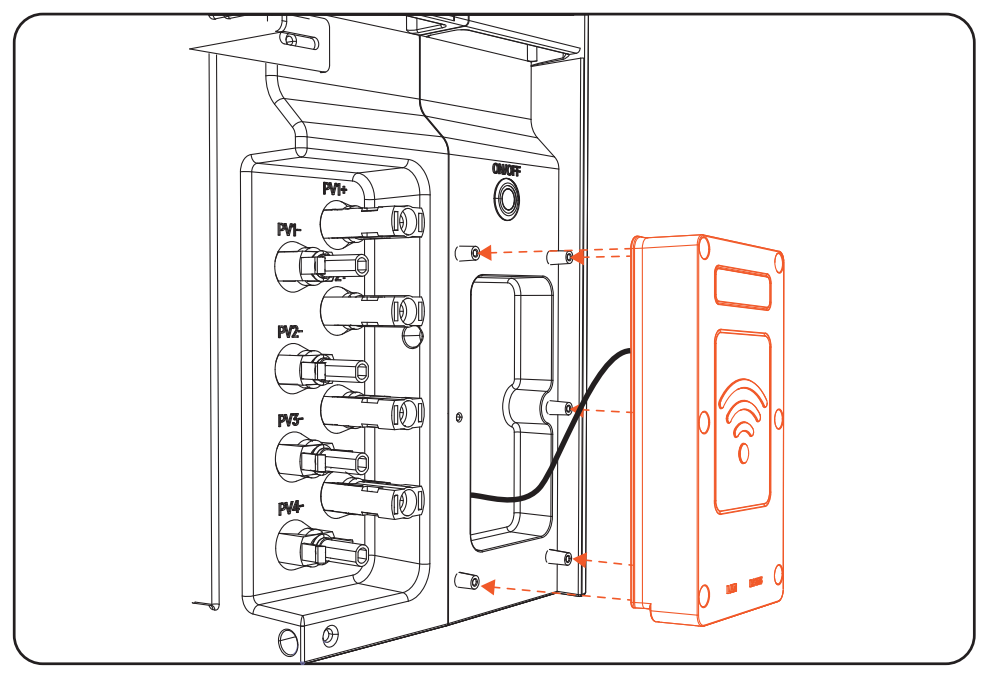
2. Remove the existing module
Carefully pull the module straight out from the slot.

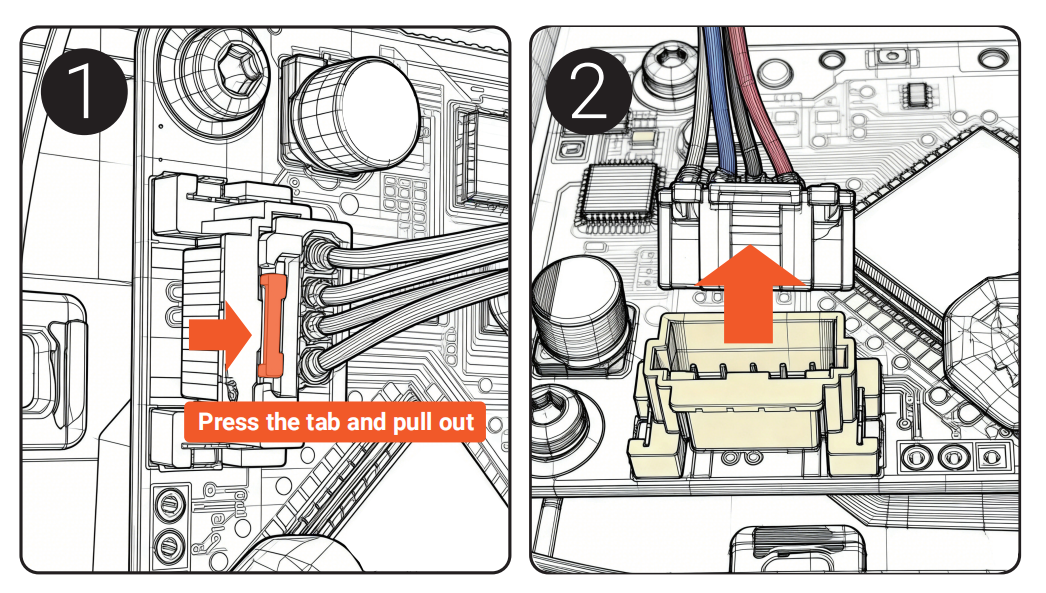
3. Disconnect the communication cable
Press and hold the locking tab on the connector, then gently unplug the communication cable.
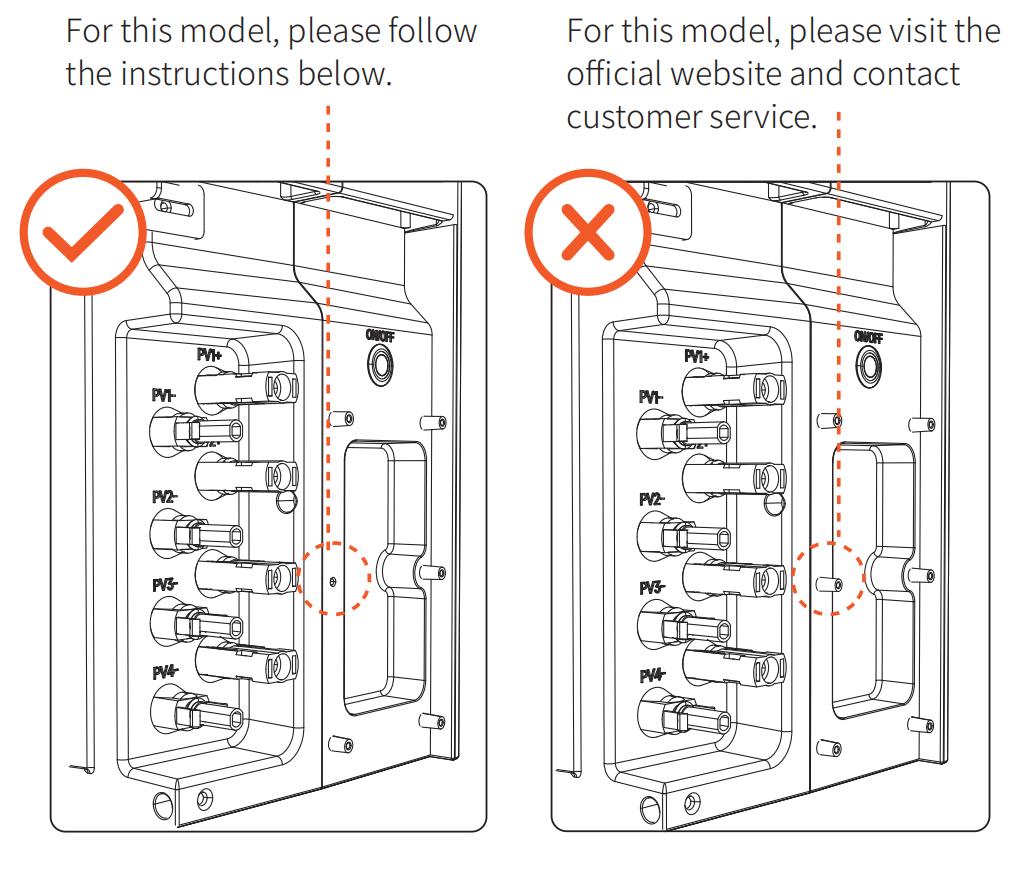
After removing the module, check whether the slot is compatible with the screw connectors of the new module.
Step 2. Install the New Module
1. Connect the communication cable
Insert the communication cable into the corresponding connector on the new PCB until it is securely connected.
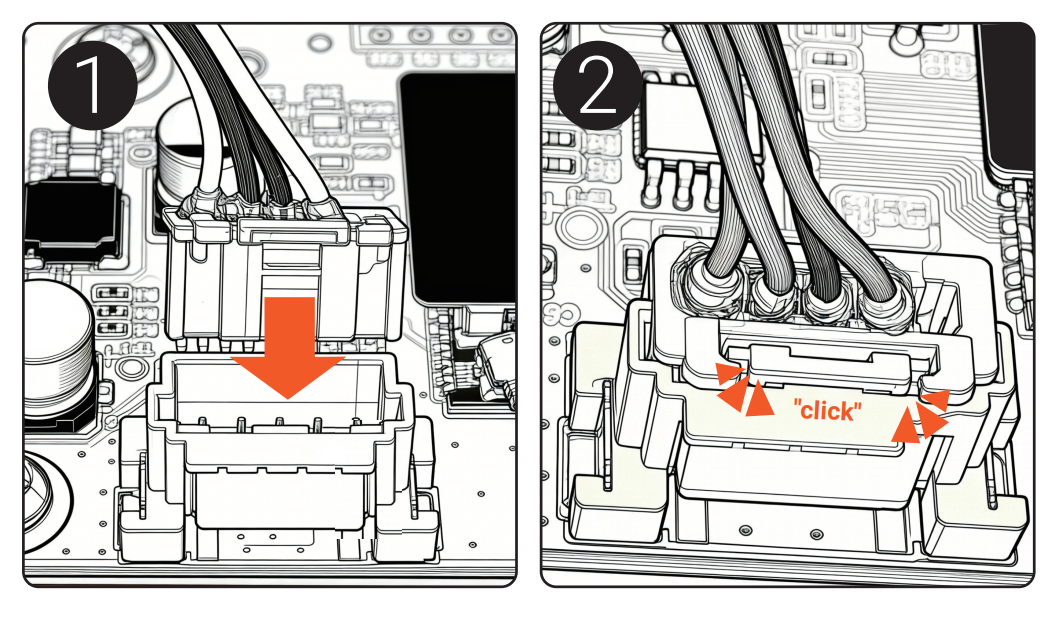
2. Install the new module
Align the new module with the slot and gently push it into place until it is fully seated.
3. Secure the module
Reinstall the six screws removed earlier and tighten them securely using the screwdriver.
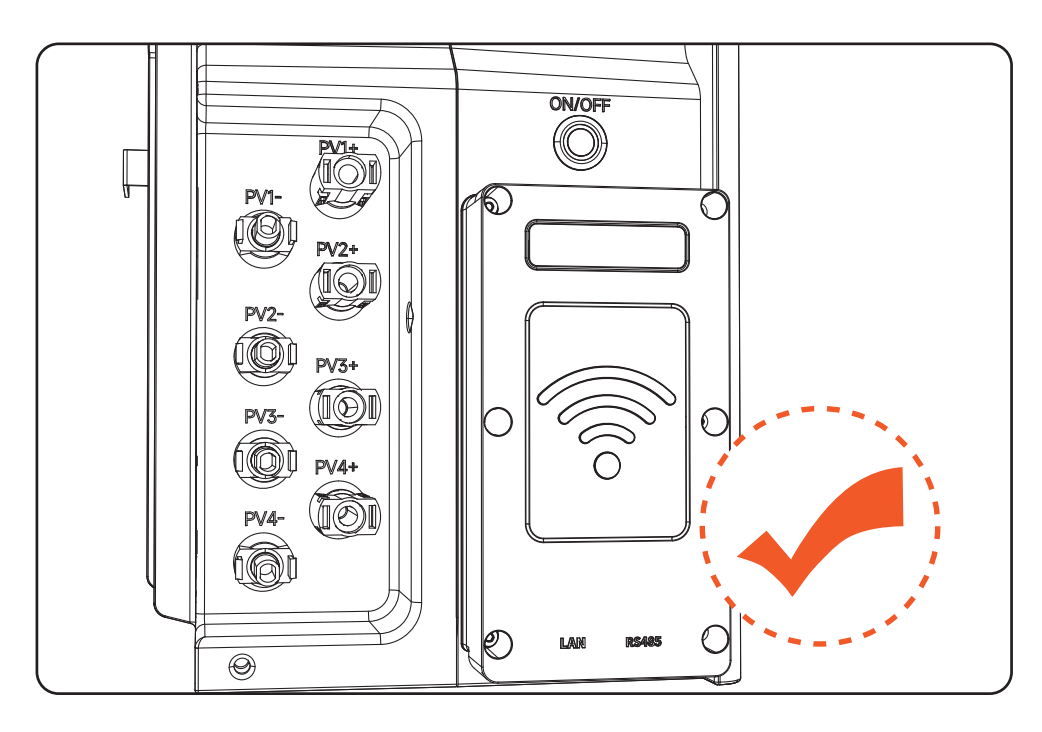
4. Verify the installation
Check that:
- The module is fully inserted.
- All screws are securely tightened.
- The cover plate is properly secured and not loose.
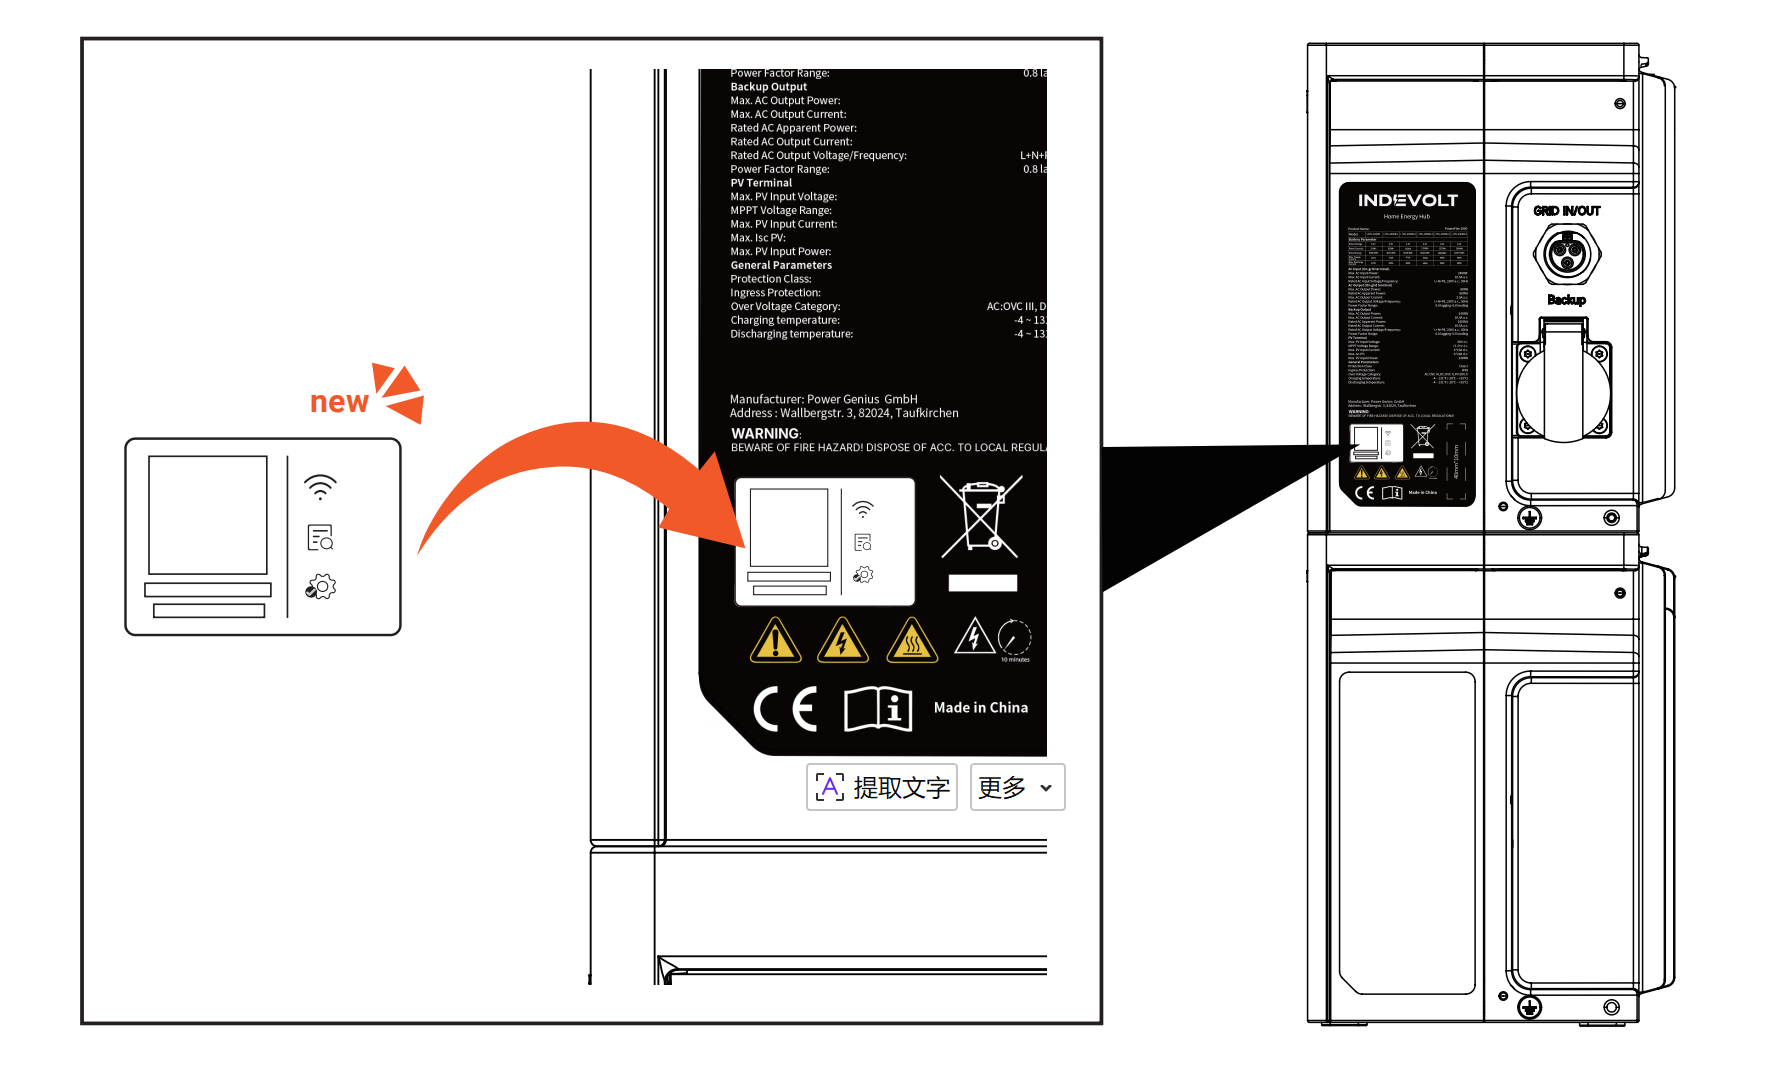
5. Apply the new serial number label
Cover the original serial number label on the device using the new SN sticker provided in the package. The App will recognize the device using the new serial number.
Ensure that both of the following are properly covered:
-
The original label on the top-right side of the device
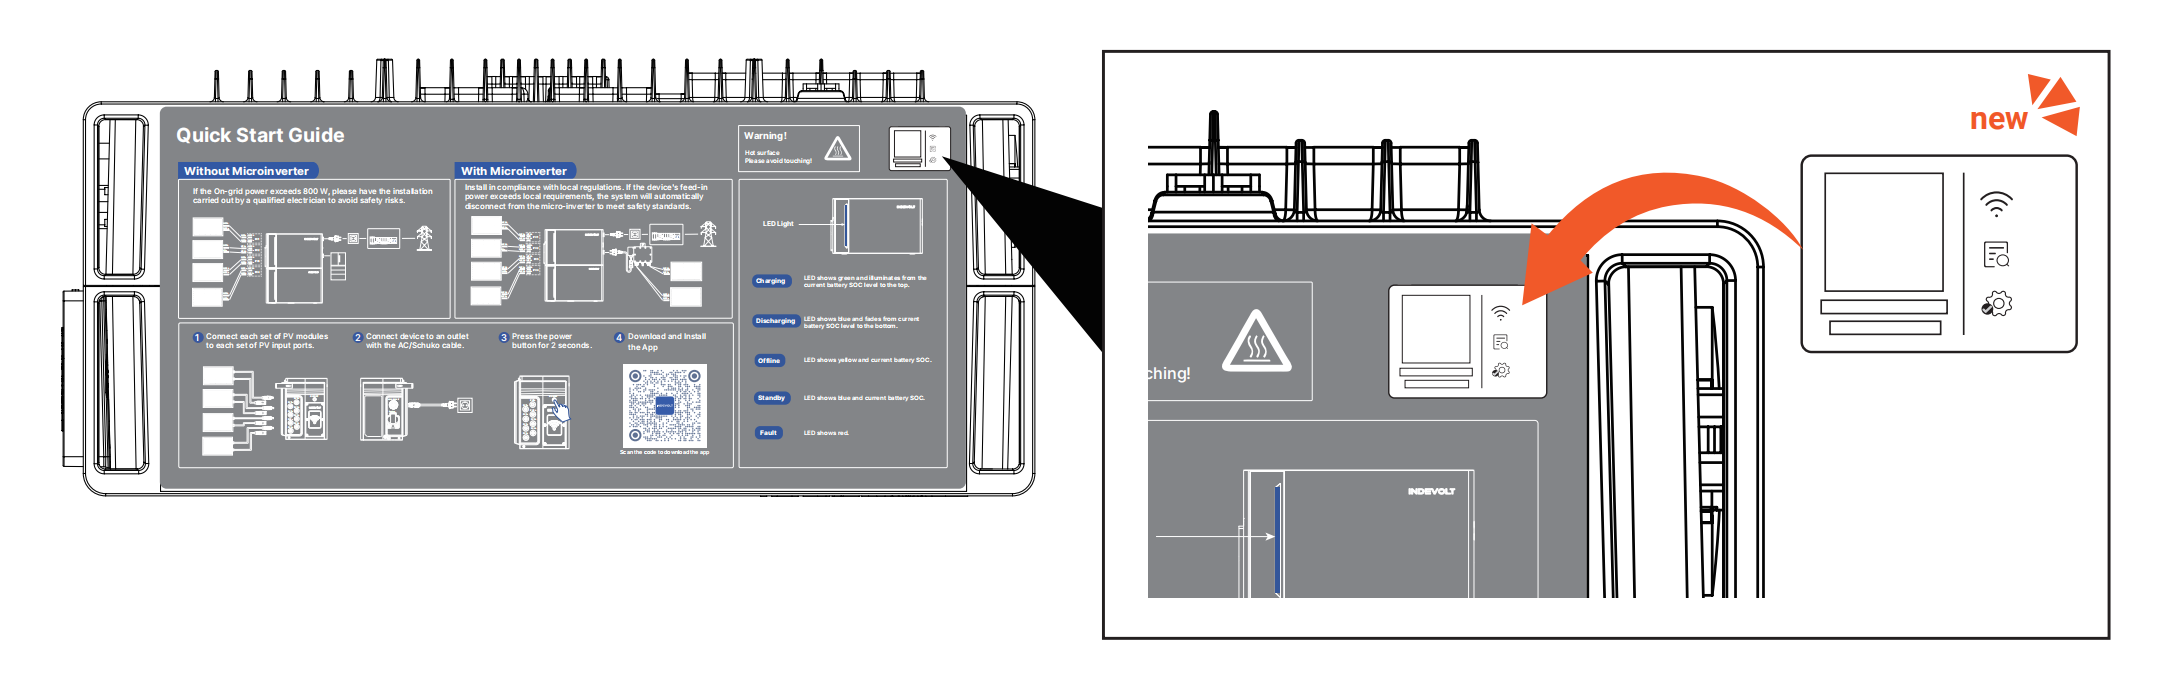
-
The nameplate label on the side of the device
Step 3. Update the Device Information in the App
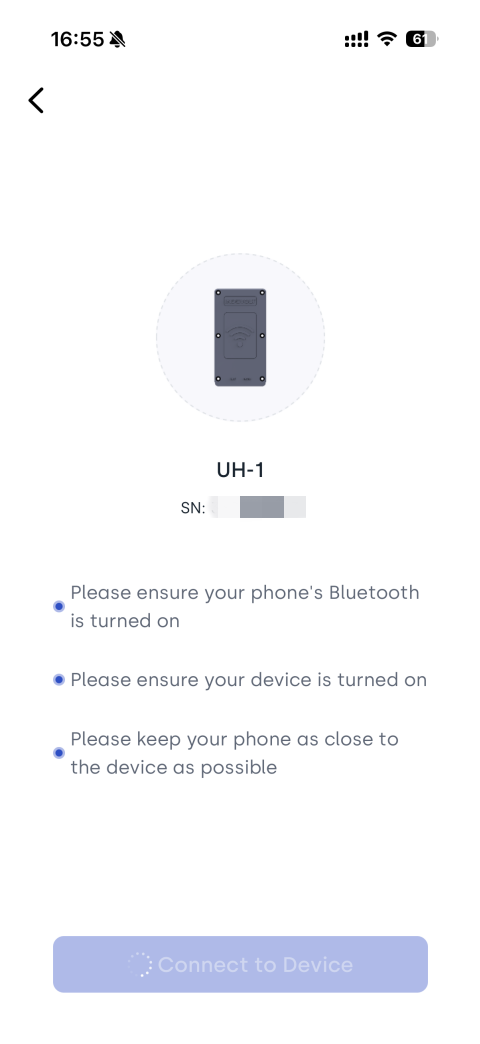
Before starting:
- Ensure Bluetooth is enabled on your phone.
- Ensure your device is turned on.
- Keep your phone close to the device throughout the process.
1. Update device information
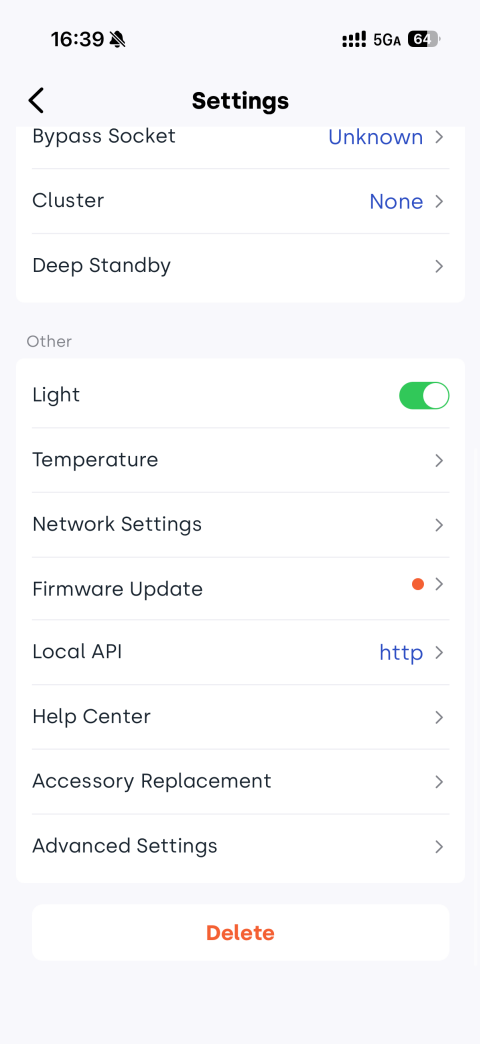
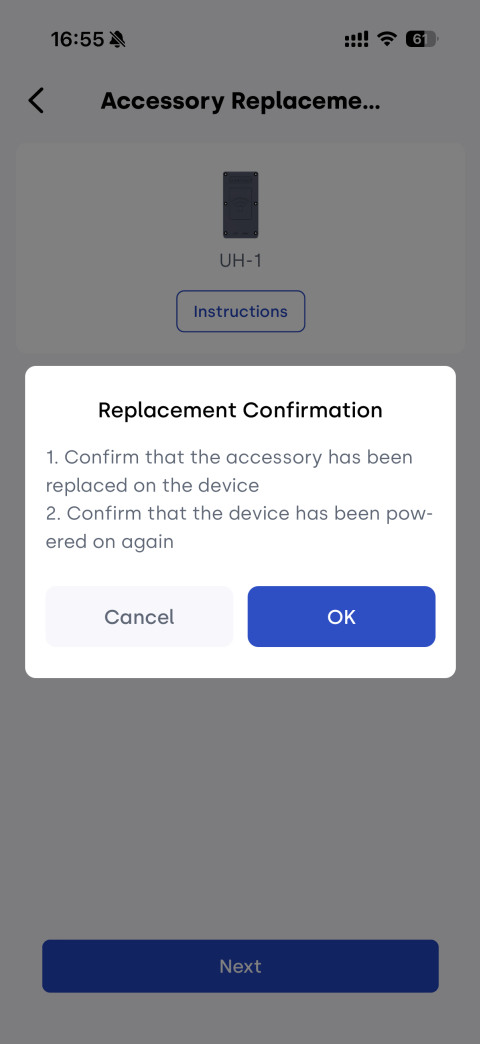
- In the device settings, tap Accessory Replacement.
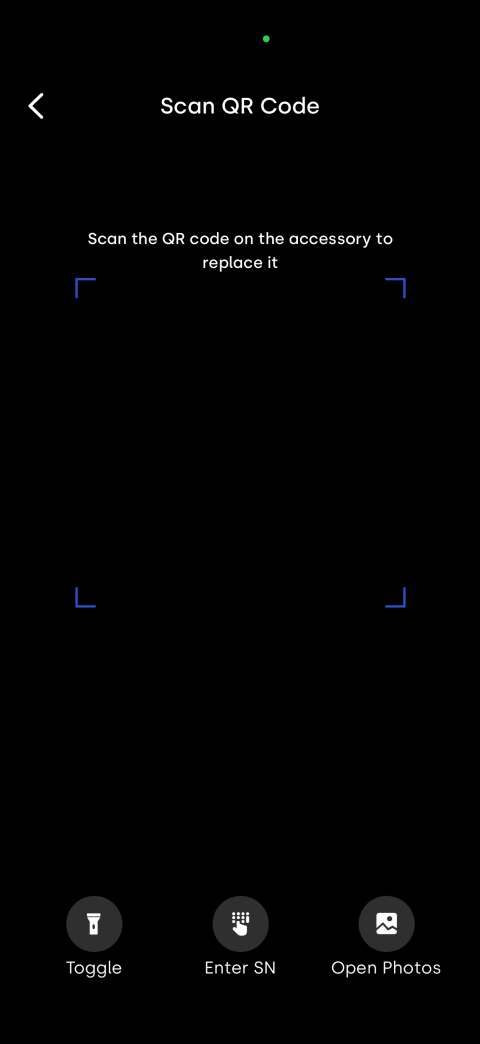
- Scan the QR code on the new accessory.
- Tap Next, review the Replacement Confirmation information, and then tap OK to continue.
- Wait for the replacement process to complete.
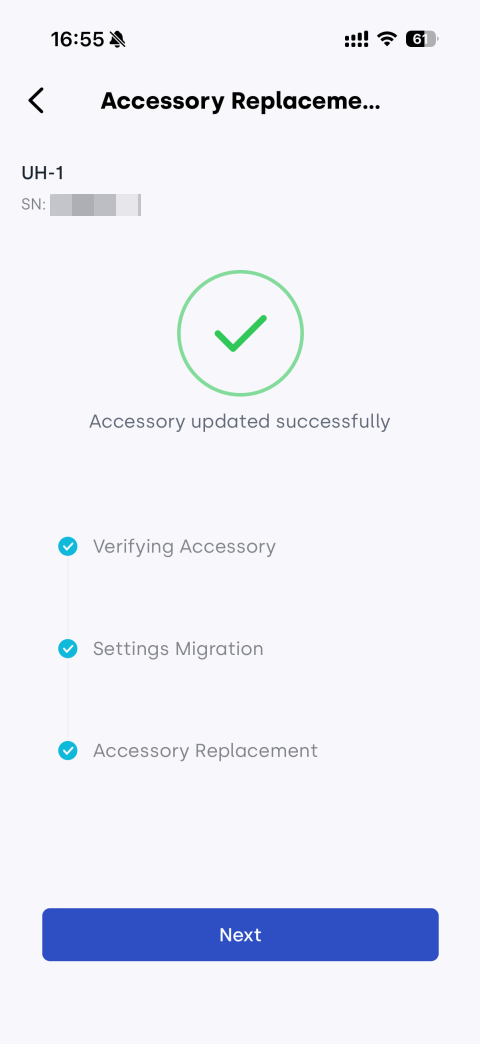
During this process, the system automatically updates the accessory information and migrates the device settings, including cluster settings, load source settings, linked devices.
- After the accessory information has been updated successfully, tap Next to continue.

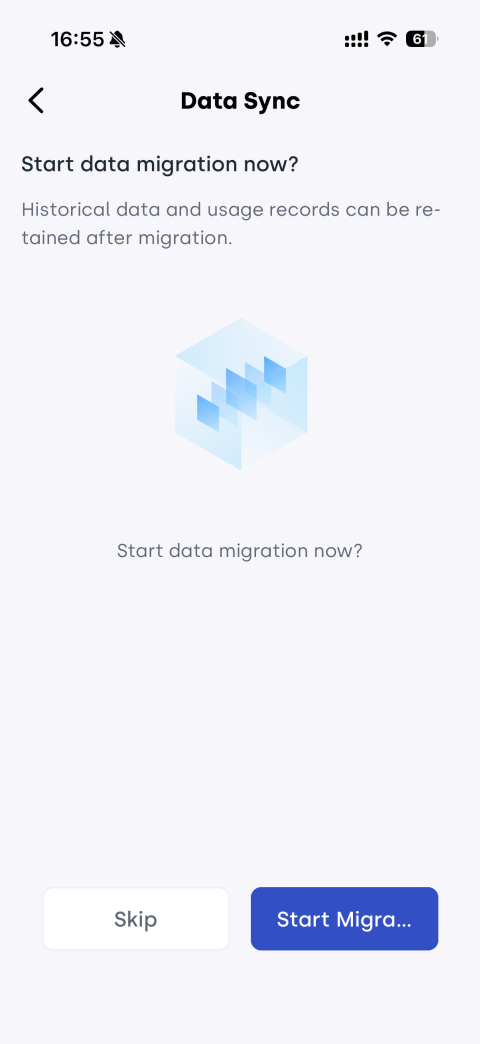
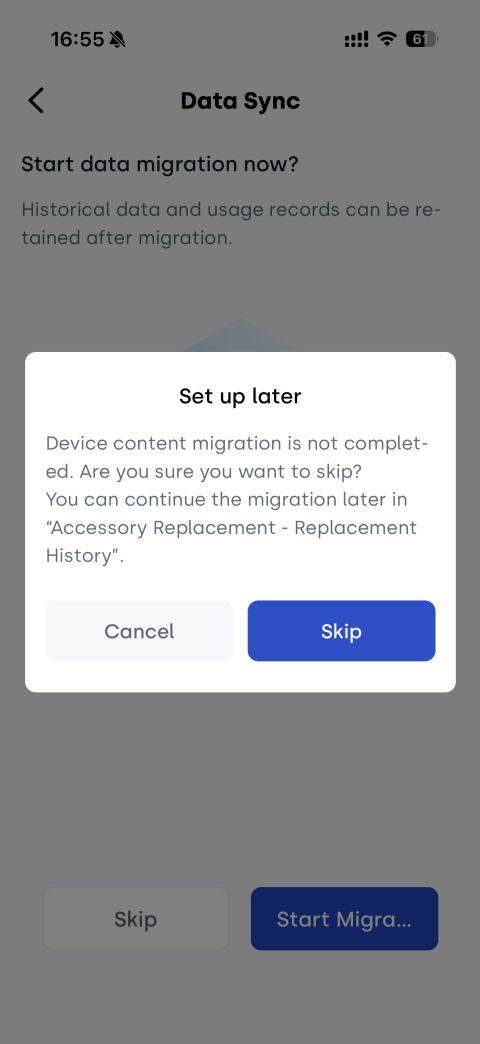
2. Migrate historical data
Tap Start Migration to migrate historical data.
If you do not want to migrate historical data immediately, tap Skip. You can start the migration later from Replacement History.
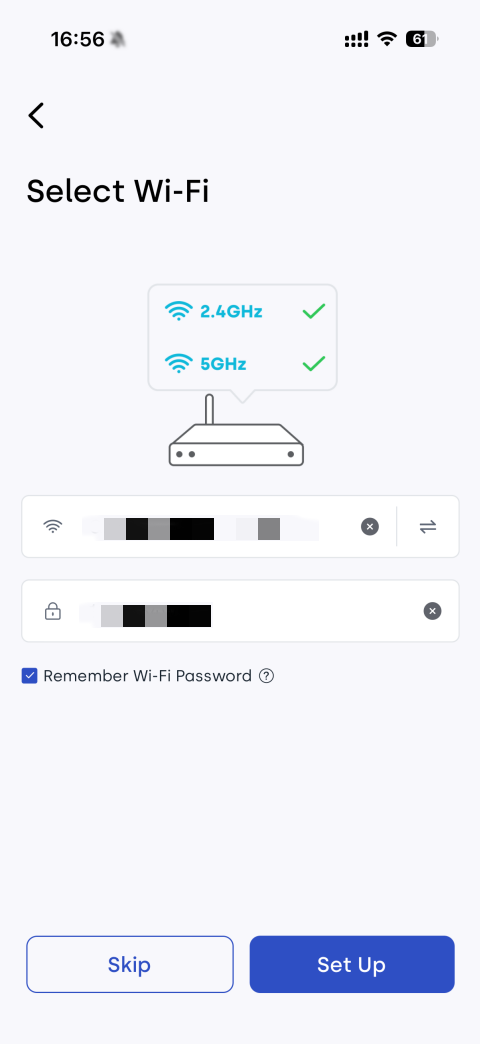
3. Reconnect the device to the network
- Enter the Wi-Fi network name (SSID) and password, then tap Set Up.
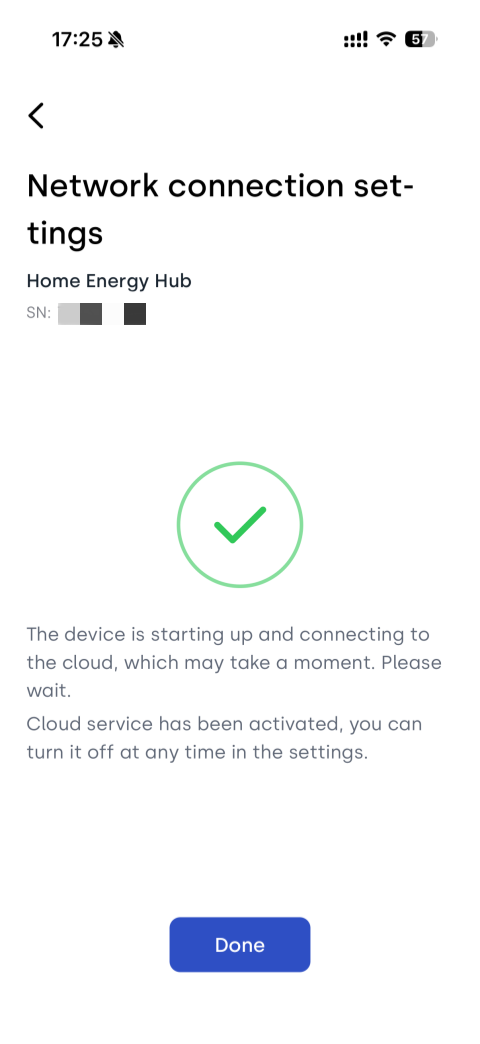
- Wait until the network connection is established successfully.
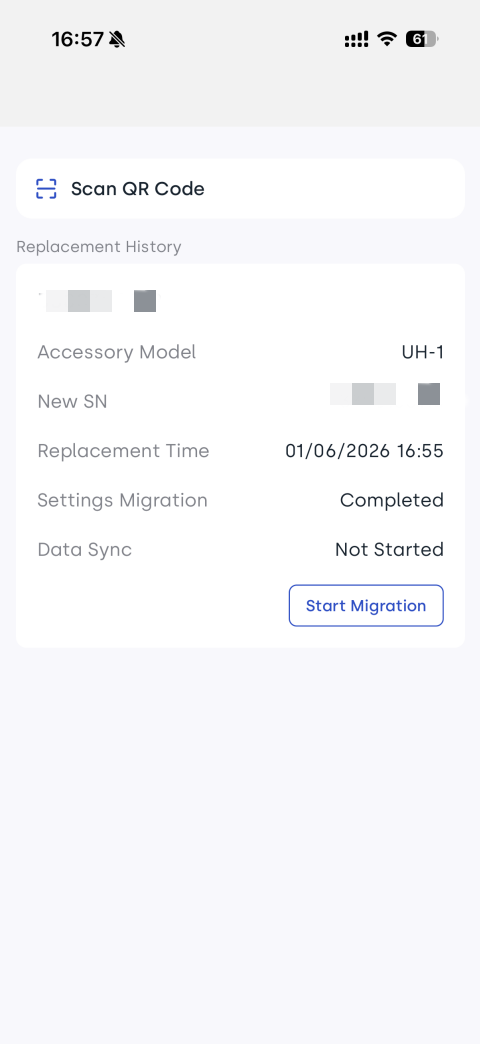
4. View Replacement History
To view previous replacement records, go to: Settings > Accessory Replacement
In Replacement History, you can:
- View replacement records, including the replacement time, settings migration status, and historical data migration status.
- Tap Start Migration for a specific record to open the Device Migration page. Start historical data migration if it has not yet started.
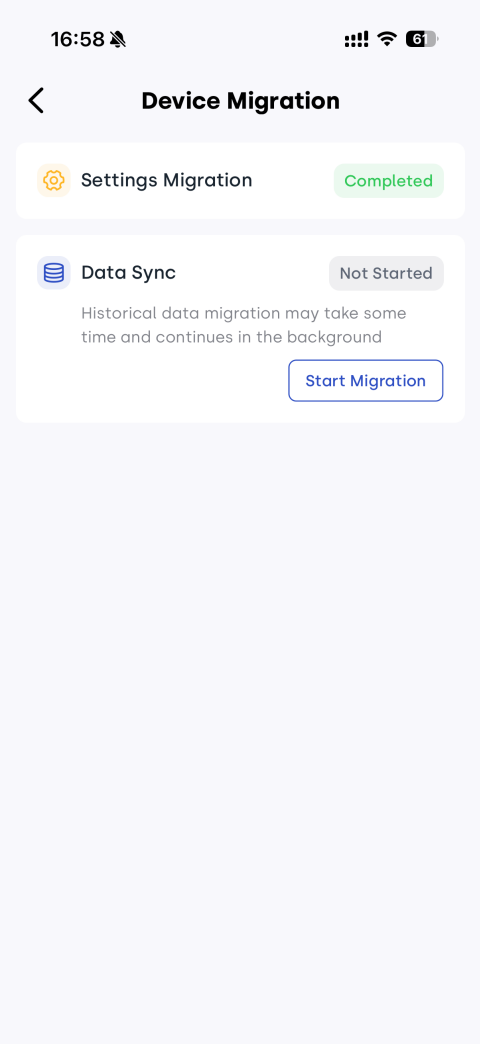
Data migration is performed automatically in the cloud after it has been started. You do not need to stay on the Device Migration page while the migration is in progress.
You can view the migration status and progress at any time in Replacement History.